Tuesday, July 30, 2013

And on the fifth day... plants! Y en el quinto día... plantitas!

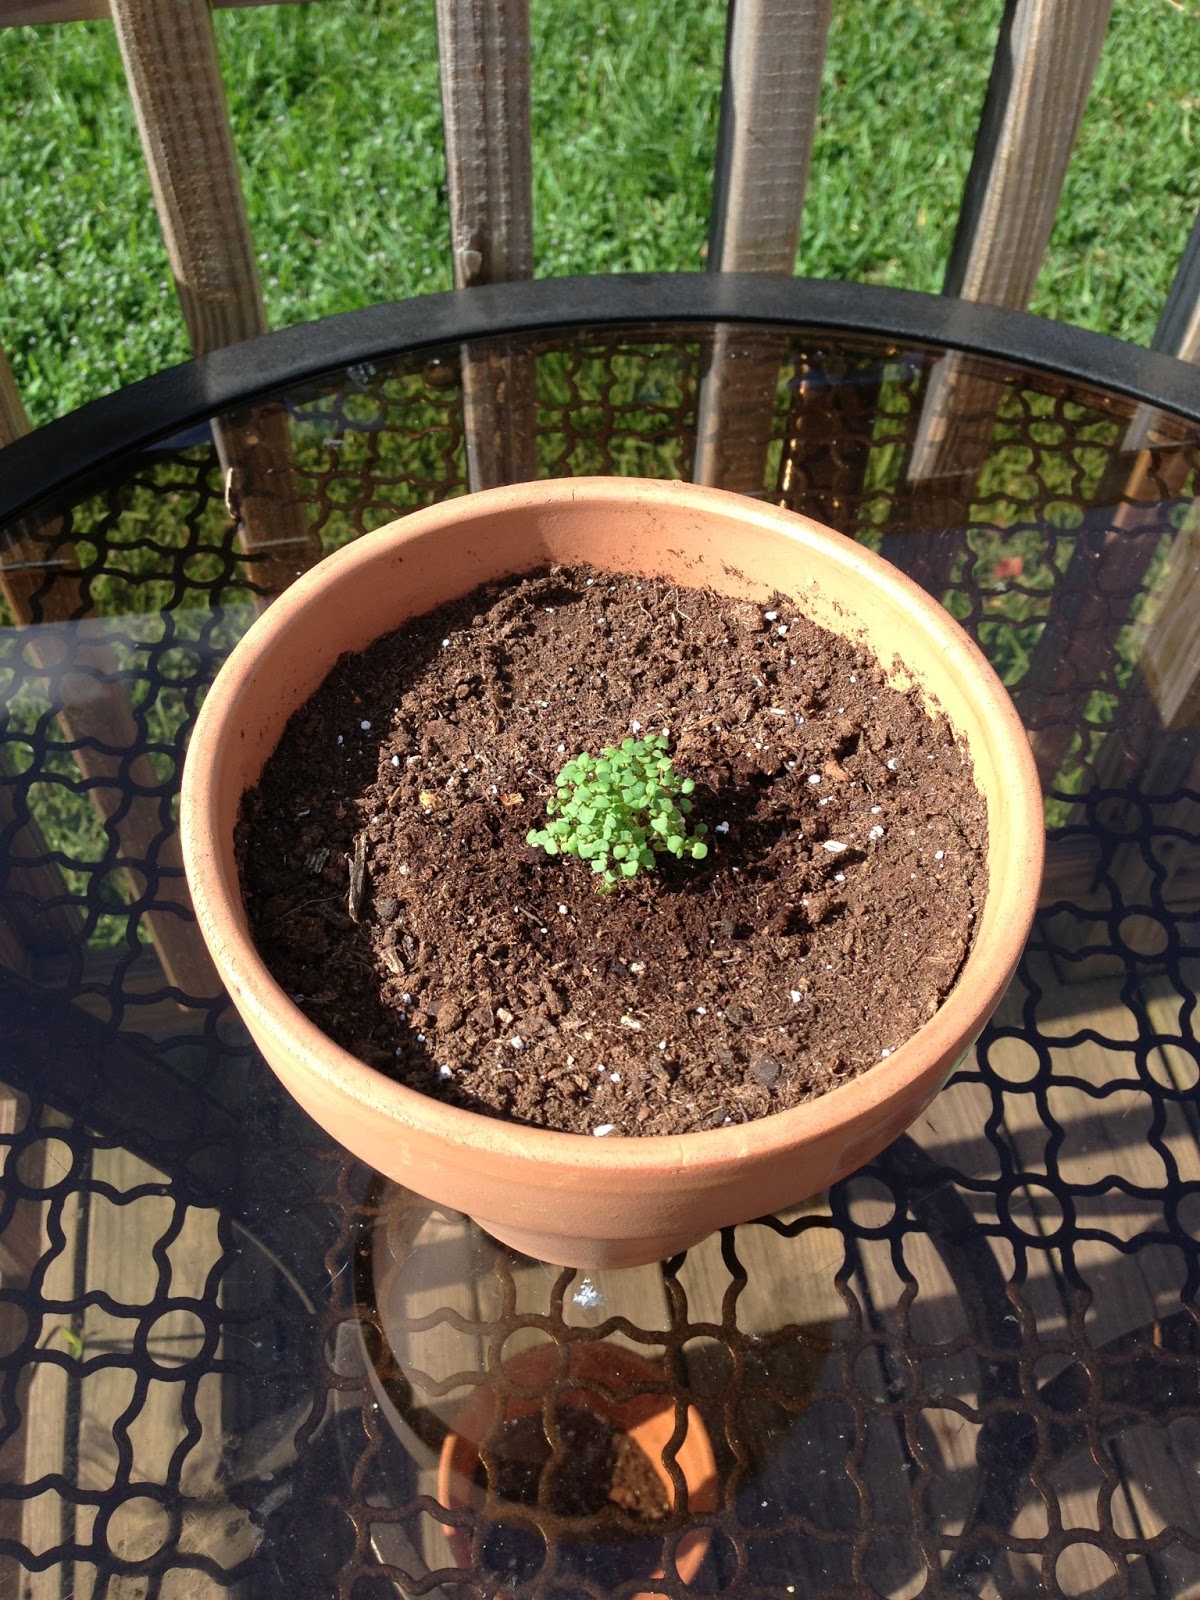
I admit, the "Ultimate Growing System" not only works but also accelerates the growing of the seeds. The ones I planted in the clay pots took between 7 and 14 days to pop up, while the ones in the UGS pellets started to grow 4 days after the sowing. This also means that the seeds have a good quality (I bought them from www.burpee.com and www.mypatriotsupply.com), because almost all have popped.


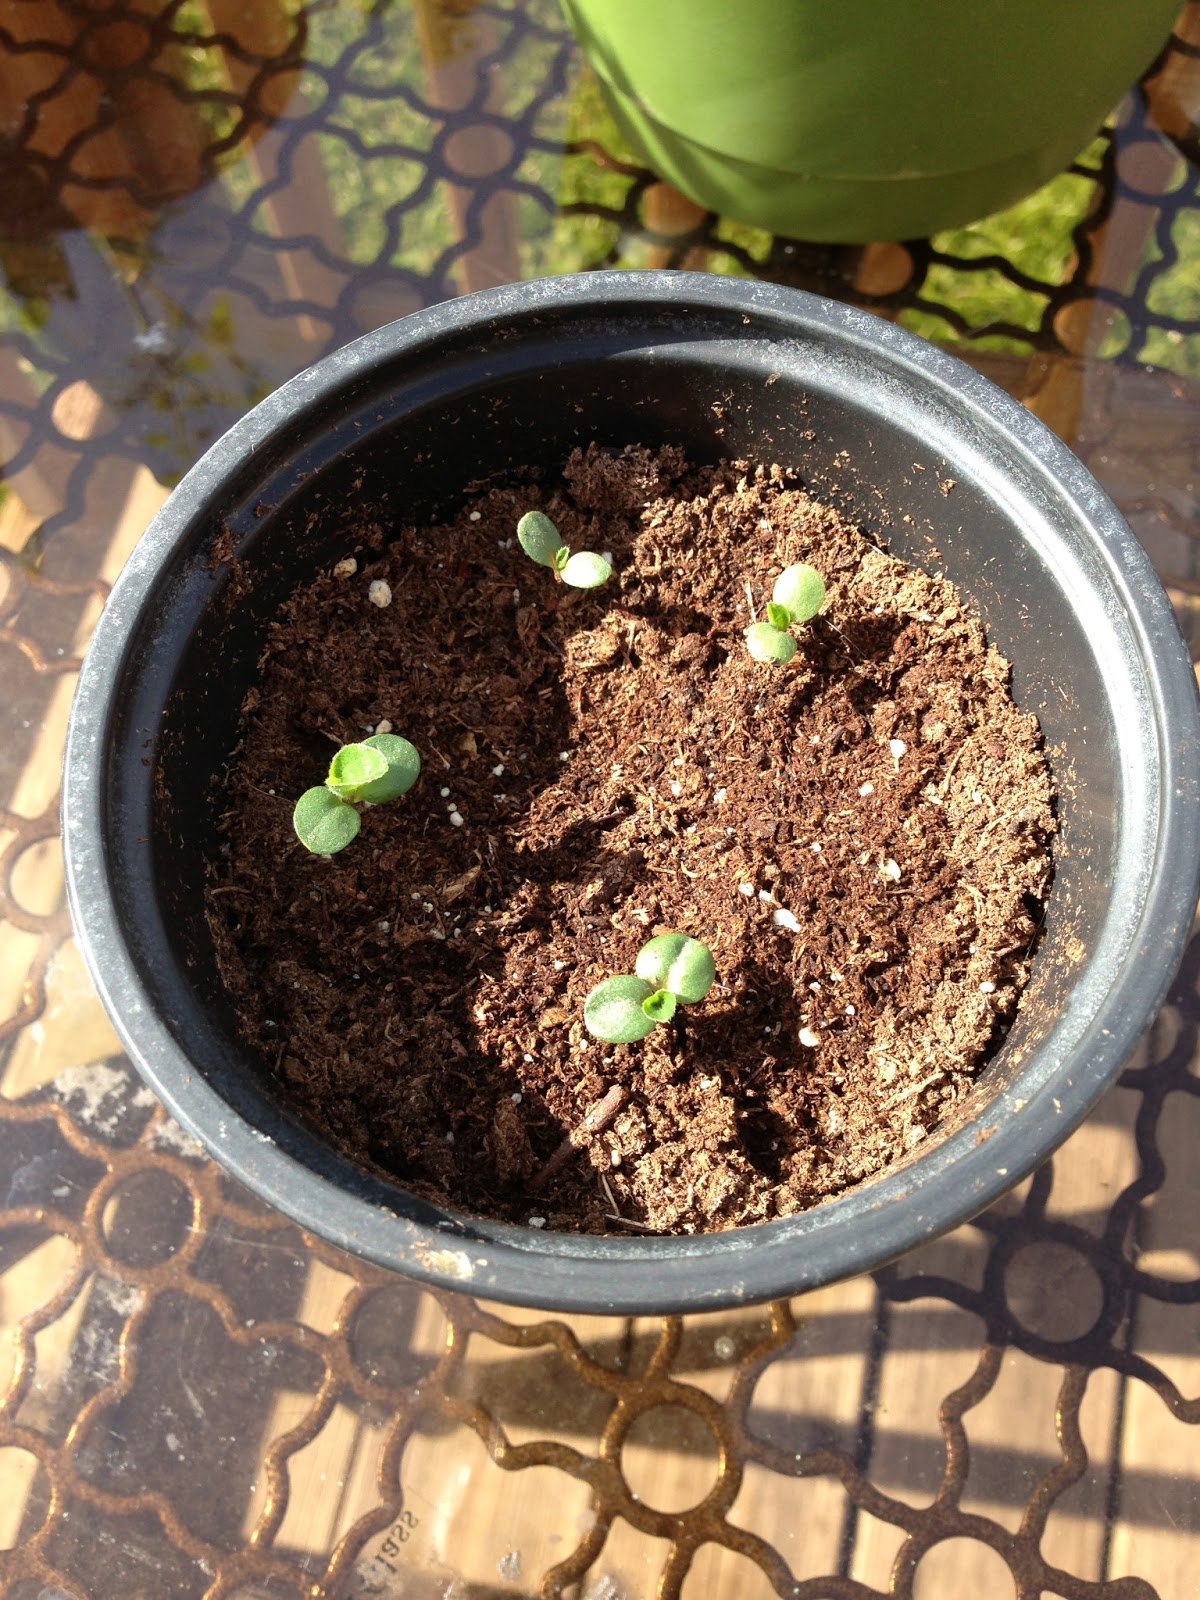
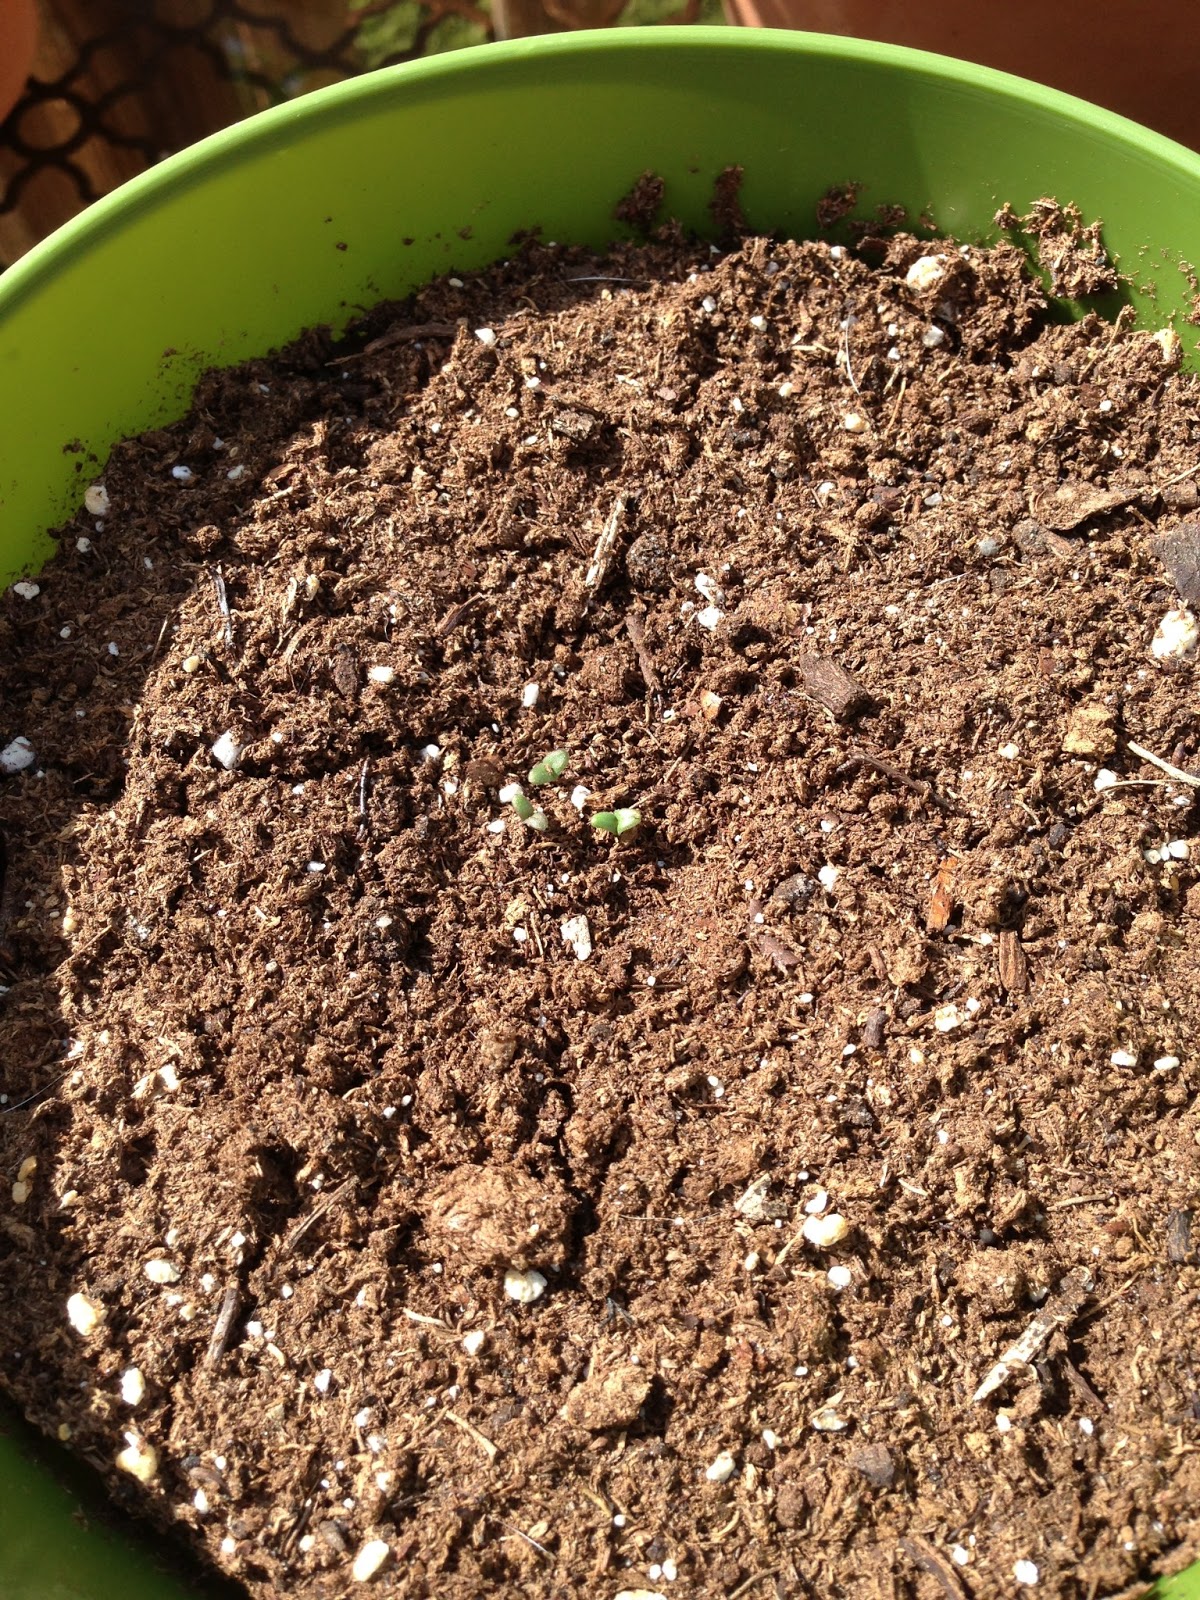
(Please, forgive me for the quality of the picture, I did it with my iPhone). As you can see, I have my first sprouts. Starting from the first row, from the right and going to the left: borage, chamamille and thyme. The first cell starting from the bottom left is oregano, and there's another borage in the following row. 
At this point, I've decided to stop sowing and focus on the plants that I already have. In a couple of weeks I'll need to fertilize the new ones and probably buy new and bigger pots for the older ones. Also, I will probably have more sprouts so I will be busy. Now it's the most complicated part of the process, being patient and constant!


______________________________________________________________________________


He de decir que la técnica de siembra con el "Ultimate Growing System" no solo funciona, sino que acelera el proceso de germinado unos cuantos días. Cuando planté las semillas en maceta tardaron entre 7 y 14 días en germinar, mientras que con este sistema empezaron a aparecer al cuarto. Esto también quiere decir que acerté comprando las semillas en las webs que ya comenté (www.burpee.com y www.mypatriotsupply.com), porque realmente han germinado prácticamente todas las que he plantado. 


(Disculpad la calidad de la foto, las hago con el iPhone). Como veis, tengo los primeros brotes. Empezando por la primera fila, arriba a la derecha y hacia la izquierda: borraja, manzanilla, tomillo. La primera celda empezando por abajo a la izquierda es orégano, y hay otra plantita de borraja en la fila siguiente. 

Llegados a este punto, he decidido dejar de plantar semillas y concentrarme en las plantas que ya tengo, que no son pocas la verdad. En un par de semanas va a tocar fertilizarlas y probablemente trasplantar alguna y seguramente el resto de las que faltan por germinar ya lo habrá hecho, con lo cual voy a tener suficiente trabajo. Ahora queda la parte más complicada, tener paciencia y ser constante!

Sunday, July 28, 2013

Receta: salsa de tomate natural. Recipe: homemade tomato sauce.

Vuelta a los básicos. Parece una receta muy obvia, pero lo cierto es que me cuesta encontrar una salsa de tomate natural que me guste (que sepa a la de mi madre, vaya!). Es cuestión de saber el punto de todo, pero tal y como la hago yo me gusta bastante. Ahí va!


Ingredientes

- 1 diente de ajo
- 1 cebolla grande
- 1kg de tomate pera (aunque yo he usado tomate de ensalada, del pera se consiguen 
  mejores resultados)
- azúcar moreno
- sal 
- aceite de oliva


Como hay que pelar los tomates, un truquito que va de maravilla es ponerlos a hervir en agua durante 30 segundos y escurrirlos en agua muy fría. Así la piel se suelta mucho más fácilmente. Los pelamos y troceamos. 


Cortar el ajo a láminas y la cebolla a juliana. En una cazuela ponemos aproximadamente un dedo de aceite. Echamos los ajos y cuando se empiecen a dorar, echamos la cebolla.


Cuando la cebolla empiece a transparentar, echamos los tomates, sal y azúcar al gusto y removemos bien. Para que los tomates se deshagan bien, removemos a la vez que vamos troceando con la cuchara de madera.


Lo dejamos haciendo unos 20 minutos, removiendo a menudo. Et voilà! Durante un tiempo la pasaba por la batidora, pero ahora la verdad es que la dejo tal cual porque me gustan los trocitos de tomate, eso ya va al gusto de cada cual. También le añado unas hojitas de albahaca fresca a la hora de mezclarla con la pasta.


Que aproveche!


______________________________________________________________________________


Back to basics. I know you must think it's a very simple recipe, but truth is that I rarely find a tomato sauce made like my mother's. Is a matter of finding the measure of all the ingredients, but I like it the way I do it. Here it goes! 


Ingredients

- 1 clove of garlic
- 1 big onion
- 2.2lbs of Rome tomato (for this recipe I used salad tomato, but with the Rome you will 
  get better results)
- brown sugar 
- salt 
- olive oil


One trick to peel the tomatoes is to boil them for 30 seconds, strain and then pour cold water. This way, the skin losens up easily. We peel them and chop them up. 


Chop the garlic and cut the onion in strips. Add a finger's length of olive oil to a pot, when it's warm add the garlic. When the garlic starts getting a golden color we add the onion. 


When the onion starts becoming transparent, we add the tomatoes, salt and sugar and we stir well. The tomato pieces are still fairly big so we must smash them with the help of the wooden spoon and at the same time we keep stirring. 


Let it cook for 20 minutes, stirring regularly. Et voilà! I used to blend it, but now I don't because I like the pieces of tomato in the sauce, it really depends on you. I also add some fresh leaves of basil when I add it to my pasta. 


Enjoy!

Thursday, July 25, 2013

Plants, plants! Plantas, plantas!

Well, in my last post I said that I was a bit reckless with my first sow. Seriously, I even forgot to tag the pots, so now I don't know which one is in each pot LOL :-P, but I got to identify two, the chamamille and the thyme. I won't know about the rest until the seeds that I planted yesterday grow a bit (I tagged them properly this time) so I can compare and see.
These are my two week old plants. Chamamille, Thyme, Echinacea, Anise and Lavender:
Thyme

Chamamille


I started to search for more info in the past weeks, so I decided to order a couple of items from www.burpee.com . This time I wanted to plant more "seriously" and better controlled, so I ordered this:
Ultimate Growing System from burpee.com

This system is made by two trays of 36 cells each, two plant stands that you put in the watering tray (see the picture above) and a self-watering mat that covers it. This mat maintains the moisture of the soil until the seeds grow through the water of the watering tray. It also includes a greenhouse top that has to be used until the seeds grow, but I read that it can cause diseases due to the humidity, so I chose to not to use it. I placed it inside my house but in a sunny area.

What kind of soil have I used this time? Well, I used pellets that come ready for the seeds. You only need to pour warm water and they will expand until they fill the cell. You only need to plant one or two seeds max per cell, and voilà! Well, I have to say that not all the pellets expand as promised (owwwwwww) so I didn't risk planting anything in the cells that are not properly filled. 

Pellet

Cells filled and almost filled (LOL)

As you can see, there are lots of empty cells. First because some pellets didn't expand so the seeds would have a hard time trying to reach the sunlight but also because I don't have a big variety of seeds yet, and I don't want to end with ten identical plants. This time I sowed oregano, coriander, parsley, borage and Moss-Rose (I harvested the seeds myself, yay!!). I also planted the same type a couple of weeks ago which you have already seen! 

In my next post I will show the rest of the plants I bought that are already grown. I hope you've enjoyed this post and I'm patiently waiting for your comments and advice!!


______________________________________________________________________________


Bueno, en el post anterior comentaba que me había lanzado un poco a la aventura con la primera siembra. Tanto que se me olvidó etiquetar cada una de las macetas, con lo cual ahora mismo no sé cuál es cuál! Jajajajaja He conseguido identificar dos, la manzanilla y el tomillo, pero el resto no lo sabré hasta que las semillas que planté ayer (esta vez identificadas) germinen y poder compararlas entre sí. 
Estas son mis plantitas, con dos semanas de vida. Entre ellas hay manzanilla, tomillo, equinácea, anís y lavanda:
Una de las que he podido identificar: tomillo
Otra de las identificadas: manzanilla


Esta ha sido de las últimas en germinar, hace un par de días salieron los primeros brotes


Tras informarme mejor en estas últimas semanas, decidí hacer un pedido a la web http://www.burpee.com/ . Esta vez, quise hacer una segunda siembra un poco más controlada y "seria", con lo cual encargué el siguiente sistema:

"Ultimate growing system"

Se compone de dos bandejas de 36 celdas cada una, una plataforma con patitas que se coloca dentro de la bandeja que se ve en la imagen y que se cubre con una "manta" que previamente se humedece. Esta "manta" será la que pasará la humedad al sustrato de las celdas y por lo tanto a las semillas, a través del agua de la bandeja. Incluye una tapa de plástico que según las instrucciones se debe poner hasta que las semillas germinen, pero en otros lugares he leído que recomiendan no ponerla ya que la humedad que mantiene puede ser causante de enfermedades. Ante la duda, yo he dejado la bandeja destapada, colocada en el interior de casa pero en una zona que le da la luz gran parte del día. 

Qué sustrato he usado esta vez? He usado "pellets", unos discos de preparado especial para semillas que ya venían incluidos en el pedido del "Growing system". Al regarlos poco a poco, la tierra se hincha y expande, ocupando toda la celda con lo cual solo hay que poner la semillita (una, dos como máximo, por celda). He de decir que no todas se acaban de hinchar bien (desilusión total), y no me he querido arriesgar a plantar semilla en las celdas en las que la tierra no ha acabado de amoldarse, o ha quedado muy baja (porque no les daría la luz igual y probablemente saldrían brotes más frágiles). Este es el resultado:
Discos de preparado para semillas, o "pellets"

Celdas con los discos expandidos (o casi jajaja)

Como veis, no he plantado en todas las celdas. En algunas la tierra no ha alcanzado altura suficiente, por lo que como ya he dicho no me he querido arriesgar, pero también es cierto que no he querido plantar a lo loco, ya que aún no dispongo de gran variedad de semillas, y tampoco quiero acabar con diez plantas de orégano. Esta vez he plantado, a parte de las que ya planté hace dos semanas, orégano, cilantro, perejil, borraja (Borago officinalis) y unas semillas que he extraído yo misma (no quepo en mi del gozo) de Portulaca grandiflora (Verdolaga de flor).


En el próximo post os enseñaré el resto de plantas que ya compré germinadas. Espero vuestros comentarios y consejos!!


Wednesday, July 24, 2013

Iniciación. Initiation

Bienvenid@s a mi rinconcito de jardinería. Imagino que lo más adecuado para empezar un blog con buen pie es que me presente. Me llamo Lucía, soy de Barcelona (España), tengo 25 años y hace bien poquito que he empezado en esto del cuidado de plantas, con lo cual espero que seáis benevolentes, porque estoy aprendiendo :-)

Hace un año me vine a vivir a los Estados Unidos y como tengo mucho tiempo libre mientras me salen los permisos de residencia, me he estado dedicando de pleno a mis dos grandes pasiones: mi familia (compuesta por un marido y 3 perros) y mis plantitas. Siempre he tenido mano con los animales, pero hasta hace muy poco no sabía que, aparentemente, también tengo algo de maña con la jardinería. El clima de la zona en la que vivo (sur del estado de Florida) también es de gran ayuda, aunque ahora estamos en plena época de lluvias y hay que andar con mucho cuidado de que no se te ahoguen las plantas jóvenes.

Bueno, entremos en materia. Por ahora me he centrado en las especias, ya que se pueden mantener en macetas y suelen ser más fáciles de cuidar. Mi idea es ir mejorando y adquiriendo conocimientos para así poder pasar a plantas decorativas y vegetales más "complicados". Cuál es el propósito final? La verdad es que me gustaría poder tener un jardín que llegue a abastecer mi nevera/despensa de vegetales y especias básicos. Que lo consiga ya es otra historia :-P
Hace tres semanas hice un pedido de semillas en http://www.mypatriotsupply.com/ (perdonadme los que seáis de fuera de la norteamérica continental, pero imagino que hay webs parecidas en todas partes del mundo). Las semillas que compré son lo que aquí se llama "heirloom (literalmente, "planta de herencia"), es decir, que proceden de plantas antiguas "originales", que no han sido genéticamente modificadas (que no son GMO).
Aquí tenéis más información por si tenéis curiosidad http://en.wikipedia.org/wiki/Heirloom_plant
De entre la gran variedad de semillas de la web, elegí (por su uso y grado de dificultad):

Tomillo (Thymus vulgaris)

Cilantro (Coriandrum sativum)
Manzanilla (Matricaria chamomilla)
Perejil (Petroselinum crispum)

Equinácea (Echinacea purpurea)
Orégano (Origanum vulgare)
Hisopo de anís (Agastache foeniculum)
Lavanda (Lavendula)
No está mal, eh? Se sumaron a dos plantas que compré hace ya unos meses, una menta y una albahaca, pero ya venían germinadas y listas para consumir.
Me lancé a plantarlas un poco a la aventura, usando eso sí macetas de barro con agujero para el drenaje y tierra especial para semillas. Incluso teniendo buen drenaje, les puse un fondo de unos dos dedos de piedras tipo grava, para facilitar la salida del agua.


Como no me quiero extender mucho (bueno, mucho más :-P), el resultado dos semanas después lo dejo para el siguiente blog. Espero que este primer post os haya gustado, y hasta el próximo!


______________________________________________________________________________


Welcome to my little gardening corner! I suppose that the best way to start a blog is introducing myself. My name is Lucía, I'm from Barcelona (Spain), I'm 25 and I'm a newcomer in the plant world so I hope you guys won't be to harsh with me since I'm learning LOL.

I moved to the US almost a year ago, and since I have tons of free time while I get my Green Card, I've been dedicating my time to my two biggest passions: my family (a husband and 3 dogs) and my little plants. I've always been good with animals and as of recently I found out I'm quite good at gardening too! The climate that I live in (south of Florida) is also a big help, however we are in the middle of the rainy season so we have to be very careful with overwatering the plants.

Ok, let's get into the material. So far I'm focused on certain spices because they are easier to maintain and you can have them in a flower pot. My idea right now is to learn with easier plants first and eventually get into harder flowers and veggies. But what's my goal? Sincerely, I would love to have a garden that is able to provide fresh vegetables and spices to my kitchen. So far, easier said than done LOL :-P

Three weeks ago, I made an order of seeds from http://www.mypatriotsupply.com/ (only available for the continental US). Those seeds are Heirloom, here you have more information about it http://en.wikipedia.org/wiki/Heirloom_plant. Between the all the variety of seeds on the website, I chose based on its use and difficulty, the following:
Thyme (Thymus vulgaris)

Coriander (Coriandrum sativum)

Chamamille (Matricaria chamomilla)

Parsley (Petroselinum crispum)

Echinacea (Echinacea purpurea)

Oregano (Origanum vulgare)

Anise (Agastache foeniculum)

Lavender (Lavendula)

Not bad, right? Plus a mint and a basil that I bought a couple of months ago but they were already grown and ready to harvest. 
I started planting a bit recklessly, but of course using clay pots with drainage hole and seed starting potting mix.  Even if the pots offer a good drainage, I still added a base of pebbles, to help with it. 


Since I don't want to make this post long (ok, well... longer LOL), I'm going to wait for the next one to show the results of my first sow, and the new one I did today (more professional this time). I hope you are happy with my very first post, and see you soon!