I
want to dedicate today's entry to talk about a plant that is very
useful in the kitchen, because you can cook all of its parts: the borage (Borago officinalis).
Pretty, isn't it? It originally came from Syria and Egypt, but now we can find it through all the Mediterranean, Asia and some places of the Eastern Europe. As a part of the kitchen it is frequently used in Aragón (Spain), Italy, France and Germany.
It's quite easy to plant, usually in april (in the northern hemisphere). The basal leaves are harvested during fall, the flowers the spring after. The domestic flowers are white, the wild ones are blue.
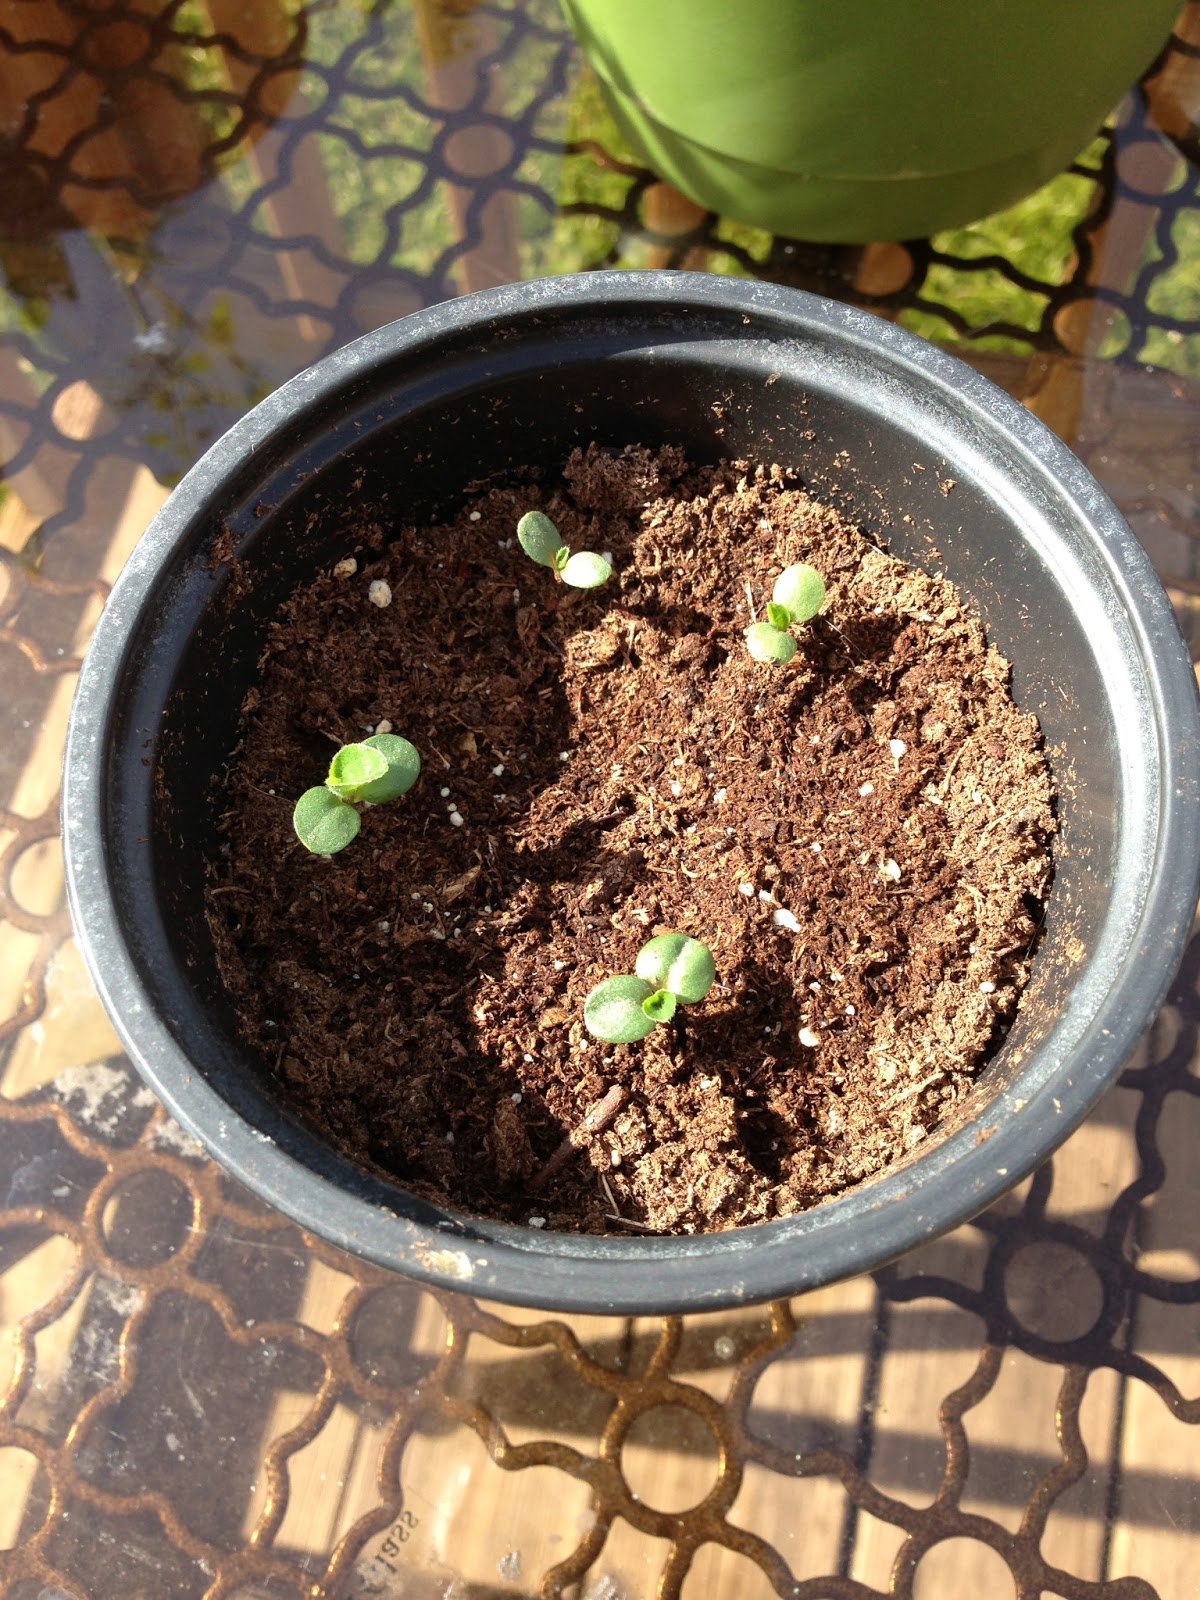
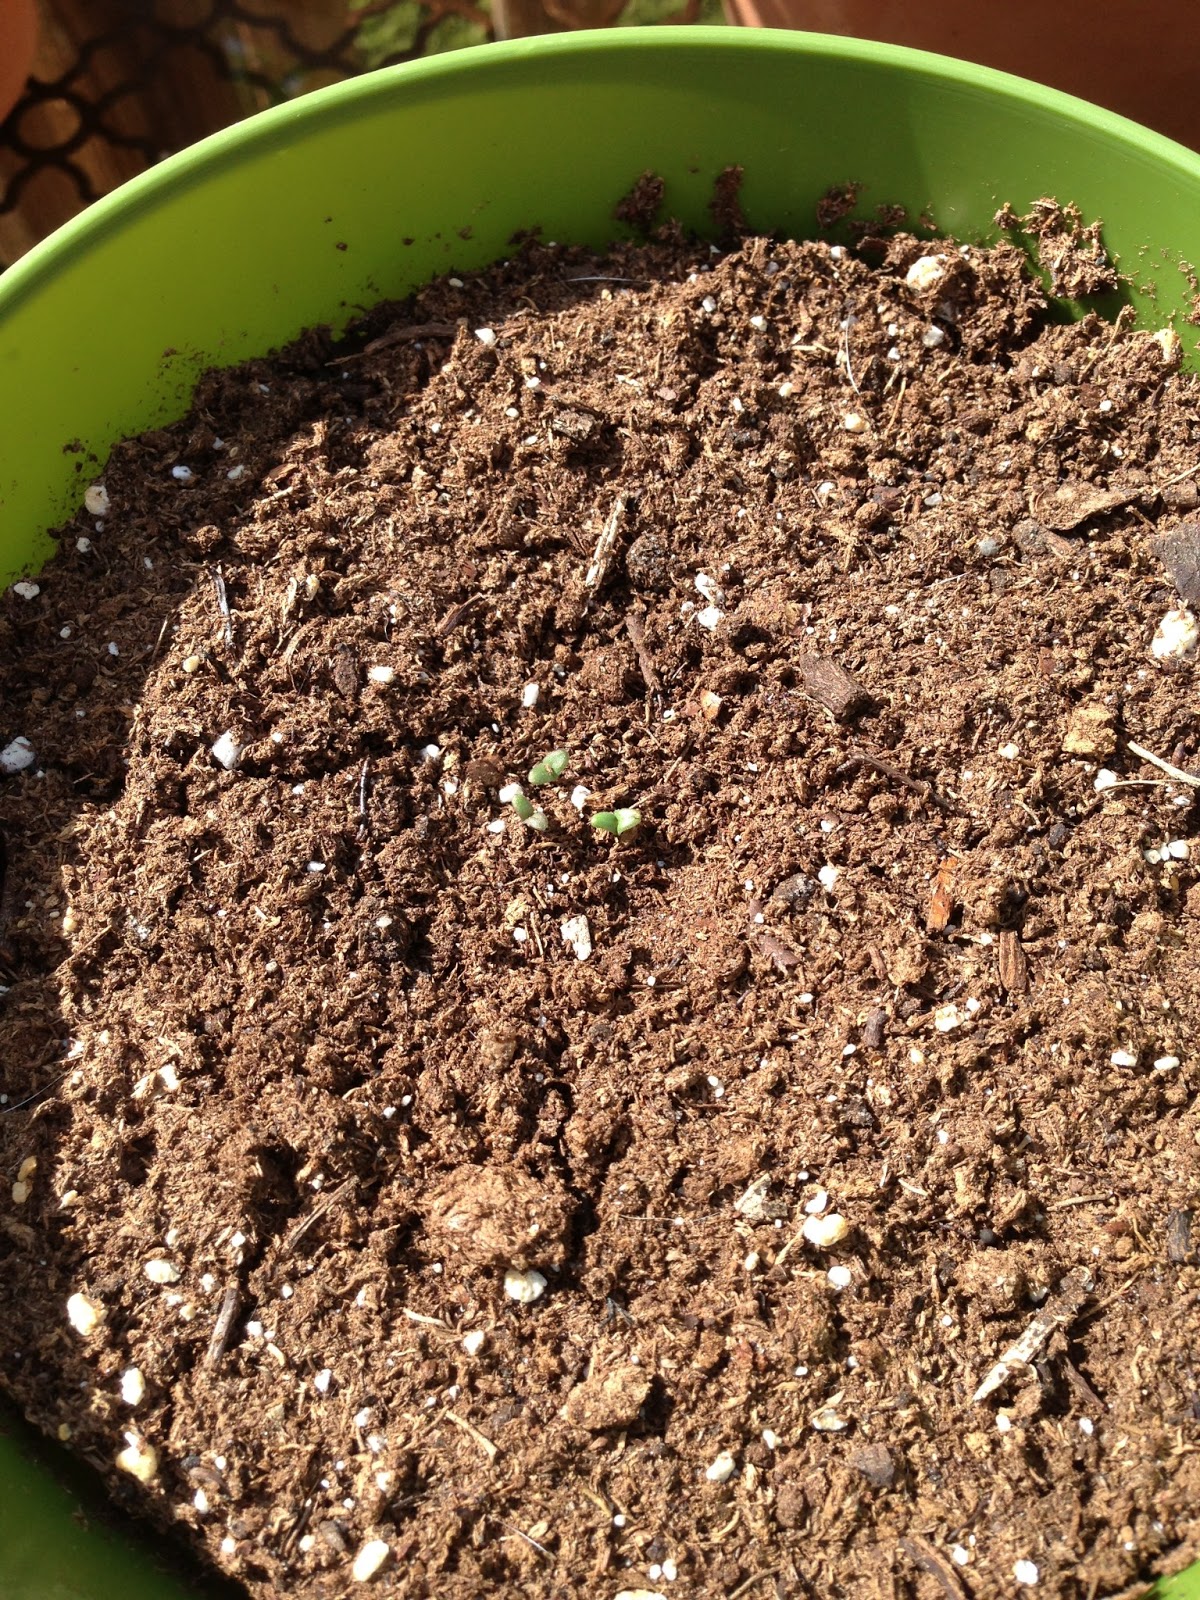
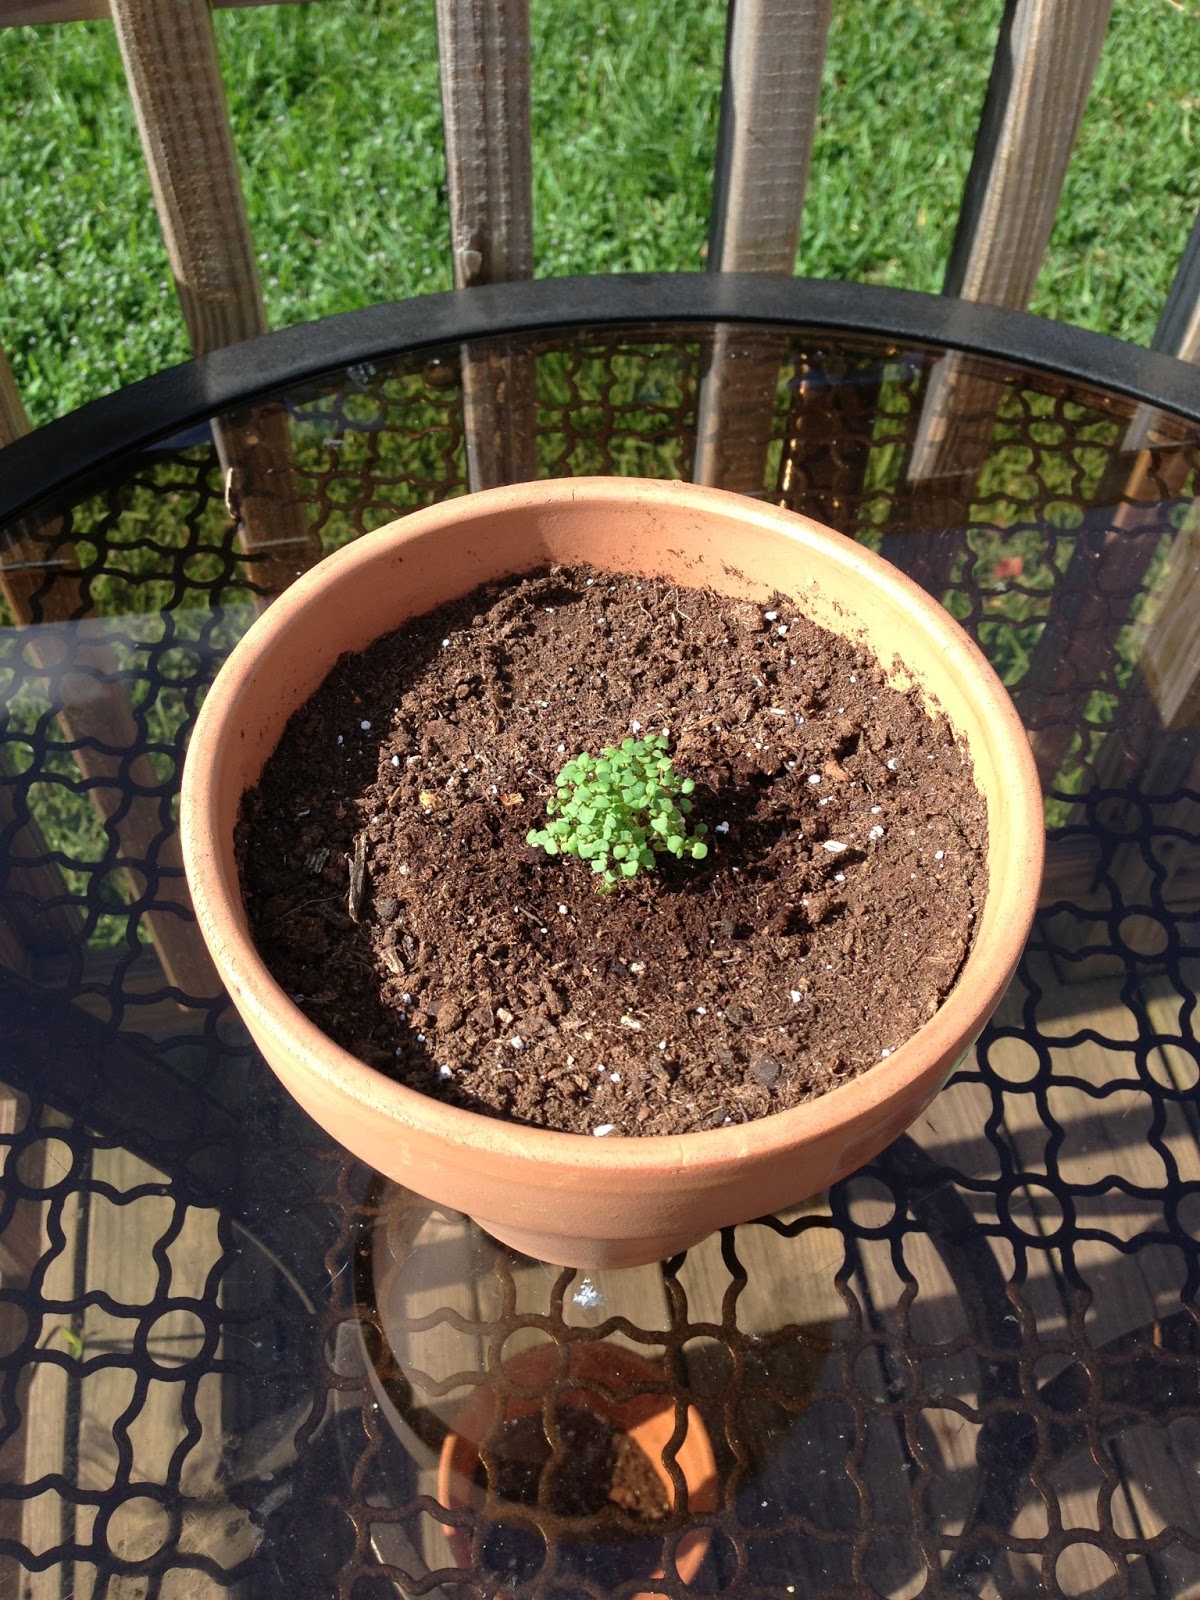
My borage sprouts popped up four days after the sowing and today, 10 days later, they are ready to occupy a flower pot in my little garden.
 |
| wild variety of borage |
It's quite easy to plant, usually in april (in the northern hemisphere). The basal leaves are harvested during fall, the flowers the spring after. The domestic flowers are white, the wild ones are blue.
My borage sprouts popped up four days after the sowing and today, 10 days later, they are ready to occupy a flower pot in my little garden.


The borage in the kitchen
As I already said, we can use the whole plant. We can do soups and broths, adding it to boiling water; its leaves and tender stems can be added to any kind of green salad; the same stems, previosuly cleaned can be cooked or steamed as a side; even more, if you fry and sweeten the leaves you can use them as a side for a dessert. Obviously, they can be drank as a tea or juice.
I've found some easy and tasty recipes that use the borage. For example, scrambled eggs: we cook the stems, sautee them with green garlic and add some mushrooms.

I don't know about you guys, but this looks like a tasty dish to me. We find it prepared like this in Aragón (Spain); in that area of the country they also cook the borage with clams or shrimps, or cooking the stems with potatoes and serving them with olive oil.
There are dozens of european recipes that use the borage. In Italy, in the area of Liguria, is the base of the "Preboggion", a mix of wild herbs that includes the borage, sow thistle (Sonchus oleraceus), corn poppy (Papaver rhoeas), bellflower (Campanula rapunculus), chicory (Cichorium intybus), beet (Beta vulgaris), stinging nettle (Urtica dioica), daisy (Hyoseris radiata), dandelion (Taraxacum officinale), smooth golden fleece (Urospermum dalechampii) and y galatsida (Reichardia picroides). If you want to know more about this recipe, click here.
Borage medicinal properties
In a tea, the flowers have the property to make you sweat. The cooked leaves have diuretic properties and as a plaster it's a good emollient.
The oil of borage seeds is both emollient and invigorating for the skin, but since is very strong it's highly recommended to use it under a doctor's supervision. This oil is good for the high blood pressure, the cholesterol and for regulate the estrogen levels. However, it's not recommended as a long treatment because it can damage the liver.
I've found some easy and tasty recipes that use the borage. For example, scrambled eggs: we cook the stems, sautee them with green garlic and add some mushrooms.
I don't know about you guys, but this looks like a tasty dish to me. We find it prepared like this in Aragón (Spain); in that area of the country they also cook the borage with clams or shrimps, or cooking the stems with potatoes and serving them with olive oil.
There are dozens of european recipes that use the borage. In Italy, in the area of Liguria, is the base of the "Preboggion", a mix of wild herbs that includes the borage, sow thistle (Sonchus oleraceus), corn poppy (Papaver rhoeas), bellflower (Campanula rapunculus), chicory (Cichorium intybus), beet (Beta vulgaris), stinging nettle (Urtica dioica), daisy (Hyoseris radiata), dandelion (Taraxacum officinale), smooth golden fleece (Urospermum dalechampii) and y galatsida (Reichardia picroides). If you want to know more about this recipe, click here.
Borage medicinal properties
In a tea, the flowers have the property to make you sweat. The cooked leaves have diuretic properties and as a plaster it's a good emollient.
The oil of borage seeds is both emollient and invigorating for the skin, but since is very strong it's highly recommended to use it under a doctor's supervision. This oil is good for the high blood pressure, the cholesterol and for regulate the estrogen levels. However, it's not recommended as a long treatment because it can damage the liver.
 |
| Otto W. Thomé, Flora von Deutschland, Österreich und der Schweiz, 1885 |
______________________________________________________________________________
La entrada de hoy va dedicada a una planta que resulta ser de gran utilidad en la cocina, ya que se usan todas sus partes: la borraja (Borago officinalis).
 |
| variedad silvestre |
Bonita, eh? Pues es originaria de la zona de Siria y Egipto, aunque la verdad es que la podemos encontrar en gran parte del Mediterráneo, Asia y en algunos lugares de la Europa Occidental. En la cocina se usa mucho en Aragón (España), en Italia, Francia y Alemania.
Se cultiva fácilmente, normalmente en el mes de abril (en el hemisferio Norte). En otoño se recolectan las hojas basales para usarlas como verdura, mientras que las flores se recolectan más adelante, durante la siguiente primavera. Las flores cultivadas suelen ser blancas, las silvestres suelen ser azules.
Mis brotes de borraja germinaron cuatro días después de la siembra y hoy, pasados 10 días, ya están listos para ocupar una macetita en mi pequeño jardín.
.jpeg)

.jpeg)
.jpeg)
Uso de la borraja en la cocina
Lo bueno que tiene esta planta es que se aprovecha toda. Se puede usar en sopa y caldo, añadiéndola al agua; sus hojas y tallos tiernos pueden incorporarse a cualquier ensalada verde; los tallos bien limpios se pueden cocer o hacer al vapor como guarnición; incluso si se fríen y endulzan, las hojas pueden acompañar un postre. Obviamente, también se pueden tomar en infusión o zumo.
He encontrado algunas recetillas que usan la borraja, sencillas y riquísimas. Por ejemplo, cocemos los tallos primero y luego los salteamos junto con ajitos tiernos y setas, haciendo un revuelto de huevo.

No sé vosotros, pero ese plato tiene una pinta deliciosa. Preparada de esta forma la encontramos sobre todo en Aragón (España); en esa zona de la Península también la cocinan combinada con almejas o gambas, o cociendo los tallos con patatas y sirviéndolo con abundante aceite de oliva.
Hay decenas de recetas que usan la borraja, procedentes de diversas regiones tanto de España como del sur de Europa. En Italia, concretamente en la zona de Liguria, es la base del "Preboggion", una mezcla de hierbas silvestres que incluye borraja, cerraja (Sonchus oleraceus), amapola silvestre (Papaver rhoeas), campanillas (Campanula rapunculus), achicoria (Cichorium intybus), remolacha (Beta vulgaris), ortiga (Urtica dioica), estrella (Hyoseris radiata), diente de león (Taraxacum officinale), roseta de Portugal (Urospermum dalechampii) y cosconilla (Reichardia picroides). Si queréis saber más sobre esta receta click aquí.
Usos medicinales de la borraja
Las flores, tomadas en infusión, tienen propiedades sudoríferas. Las hojas en decocción tienen cualidades diuréticas y a modo de emplastos sirven como emoliente.
El aceite de semillas de borraja sirve a la vez de emoliente y tonificante de la piel, pero al ser potente suele recomendarse la supervisión de un médico. Este aceite es bueno para la tensión arterial alta, el colesterol y para regular el nivel de estrógenos aunque no son recomendables los tratamientos prolongados, ya que puede llegar a ser perjudicial para el hígado.
Mis brotes de borraja germinaron cuatro días después de la siembra y hoy, pasados 10 días, ya están listos para ocupar una macetita en mi pequeño jardín.
Uso de la borraja en la cocina
Lo bueno que tiene esta planta es que se aprovecha toda. Se puede usar en sopa y caldo, añadiéndola al agua; sus hojas y tallos tiernos pueden incorporarse a cualquier ensalada verde; los tallos bien limpios se pueden cocer o hacer al vapor como guarnición; incluso si se fríen y endulzan, las hojas pueden acompañar un postre. Obviamente, también se pueden tomar en infusión o zumo.
He encontrado algunas recetillas que usan la borraja, sencillas y riquísimas. Por ejemplo, cocemos los tallos primero y luego los salteamos junto con ajitos tiernos y setas, haciendo un revuelto de huevo.
No sé vosotros, pero ese plato tiene una pinta deliciosa. Preparada de esta forma la encontramos sobre todo en Aragón (España); en esa zona de la Península también la cocinan combinada con almejas o gambas, o cociendo los tallos con patatas y sirviéndolo con abundante aceite de oliva.
Hay decenas de recetas que usan la borraja, procedentes de diversas regiones tanto de España como del sur de Europa. En Italia, concretamente en la zona de Liguria, es la base del "Preboggion", una mezcla de hierbas silvestres que incluye borraja, cerraja (Sonchus oleraceus), amapola silvestre (Papaver rhoeas), campanillas (Campanula rapunculus), achicoria (Cichorium intybus), remolacha (Beta vulgaris), ortiga (Urtica dioica), estrella (Hyoseris radiata), diente de león (Taraxacum officinale), roseta de Portugal (Urospermum dalechampii) y cosconilla (Reichardia picroides). Si queréis saber más sobre esta receta click aquí.
Usos medicinales de la borraja
Las flores, tomadas en infusión, tienen propiedades sudoríferas. Las hojas en decocción tienen cualidades diuréticas y a modo de emplastos sirven como emoliente.
El aceite de semillas de borraja sirve a la vez de emoliente y tonificante de la piel, pero al ser potente suele recomendarse la supervisión de un médico. Este aceite es bueno para la tensión arterial alta, el colesterol y para regular el nivel de estrógenos aunque no son recomendables los tratamientos prolongados, ya que puede llegar a ser perjudicial para el hígado.
|
| Otto W. Thomé, Flora von Deutschland, Österreich und der Schweiz, 1885. |






.jpeg)
.jpeg)
.jpeg)
.jpeg)


